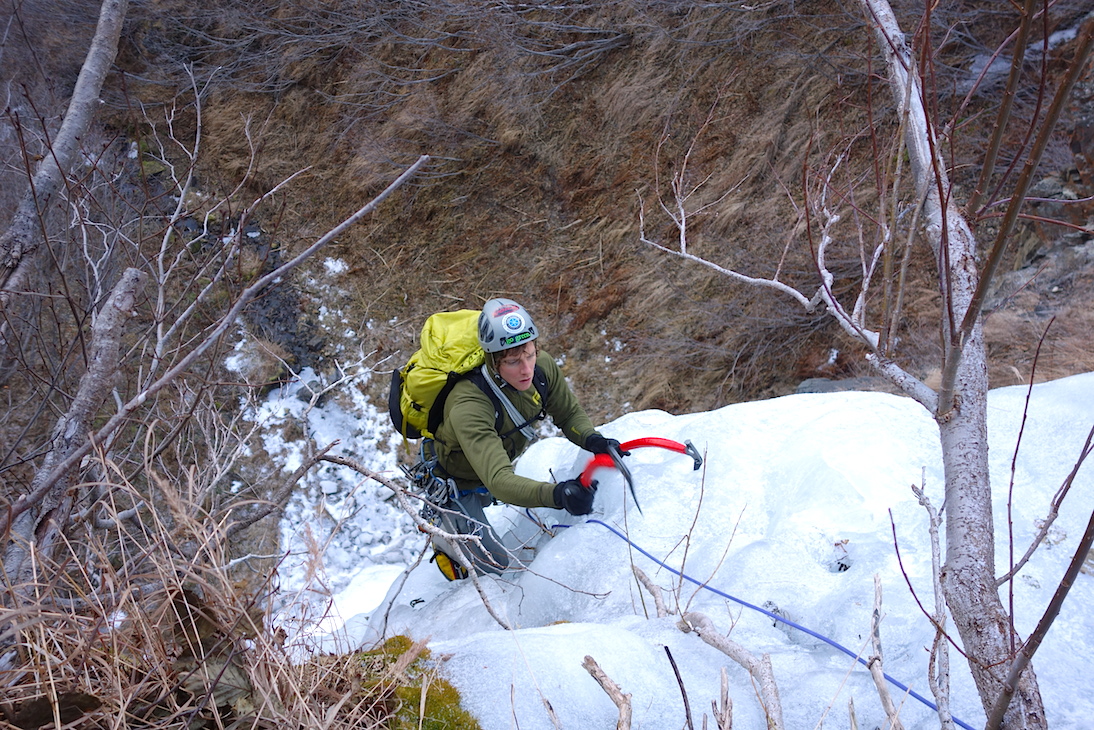
 Mat enjoying his new distractionWell, January 22nd came and the snow finally started falling in South Central AK. Truth be told, it's been snowing plenty above 2,500 feet but the more common haunts have been hurting. The telling indicator is that I'm ice climbing again. Fun but seems so much scarier and dangerous than skiing. Good for my head, though. But the arrival of the a real winter storm and cold temps, "grumpy Brian" was replaced with "hopeful/psyched Brian". That's a good thing for the people I work with. I was giddy all day.
In spite of my ice climbing adventures, skiing is what a truly love so I've been busy doing skiing related things like buying elaborate ski tuning equipment and learing how to really dial in my quiver. For someone as OCD as me, ski tuning is extremely fun and satisfying. I bought a condo recently with a heated garage so I'm no longer doing the deed in my living room. Better still.
 I want to give a serious shout out to Terry at Slidewright.com for carrying everything I need to obsess over the condition of my boards and being willing to give free advice on my many lame quesitons. In addition to carrying everything you need to develop your World Cup tuning chops, Terry has a blog with detailed instructions and videos to get most of the tasks done. I encourage everyone to pay a visit to the site but be prepared with your credit card as a frenzy of product acquisition will likely follow if you're anything like me.
Binding Insert Mania
One of my long time friends and guide buddy, Pat Ormond, who came to visit me in Chamonix during some downtime while guiding the Haute Route and Ortler Traverse last spring turned me onto some cool ski gadgetry that I've been thinking about ever since - binding inserts. Pat showed up with a couple of pairs of boards, one devoid of bindings and he proceeded to quickly switch them over while squatting on the floor of my flat. These little puppies have been part of the snow board scene for years as they allow the frequent changing of position of snow board bindings required to dial in your ride. Some time ago, someone decided that the technology could be applied to touring skis, affording some distinct advantages that interested me.
First, the primary reason that inserts have gained traction is that they permit unlimited switching of bindings from ski to ski allowing one to acquire a significant quiver of boards without having to match each pair with expensive bindings. The inserts use machine screws that make switching bindings fast and easy.
Next, the pull out strength, with their greater surface area and epoxy glue in, is far higher than typical wood screw configuration of normally mounted binders.
Better yet, when traveling with a ski bag, easily removing the bindings minimizes the space required for your skis and eliminates much of the damage potential of both skis and bindings when carried separated from each other.
So, it was with all these factors in mind that I stepped up to the plate with Slidewright and purchased what I needed for the task. There are a couple of producers of inserts, Binding Freedom and Quiver Killer, both of which seem to be interchangeable. Terry at Slidewright sells Binding Freedom.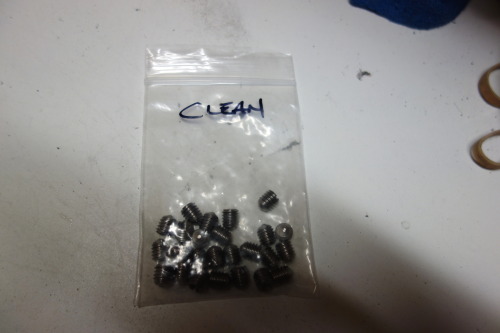
Personally, I think the first thing you need to get this job done is some intestinal fortitude and a williness to drill BIG holes in your expensive skis. Make no bones about it, this process is committing but thrilling at the same time. And if you have any craftsman in you, it's super satisfying once the job is done.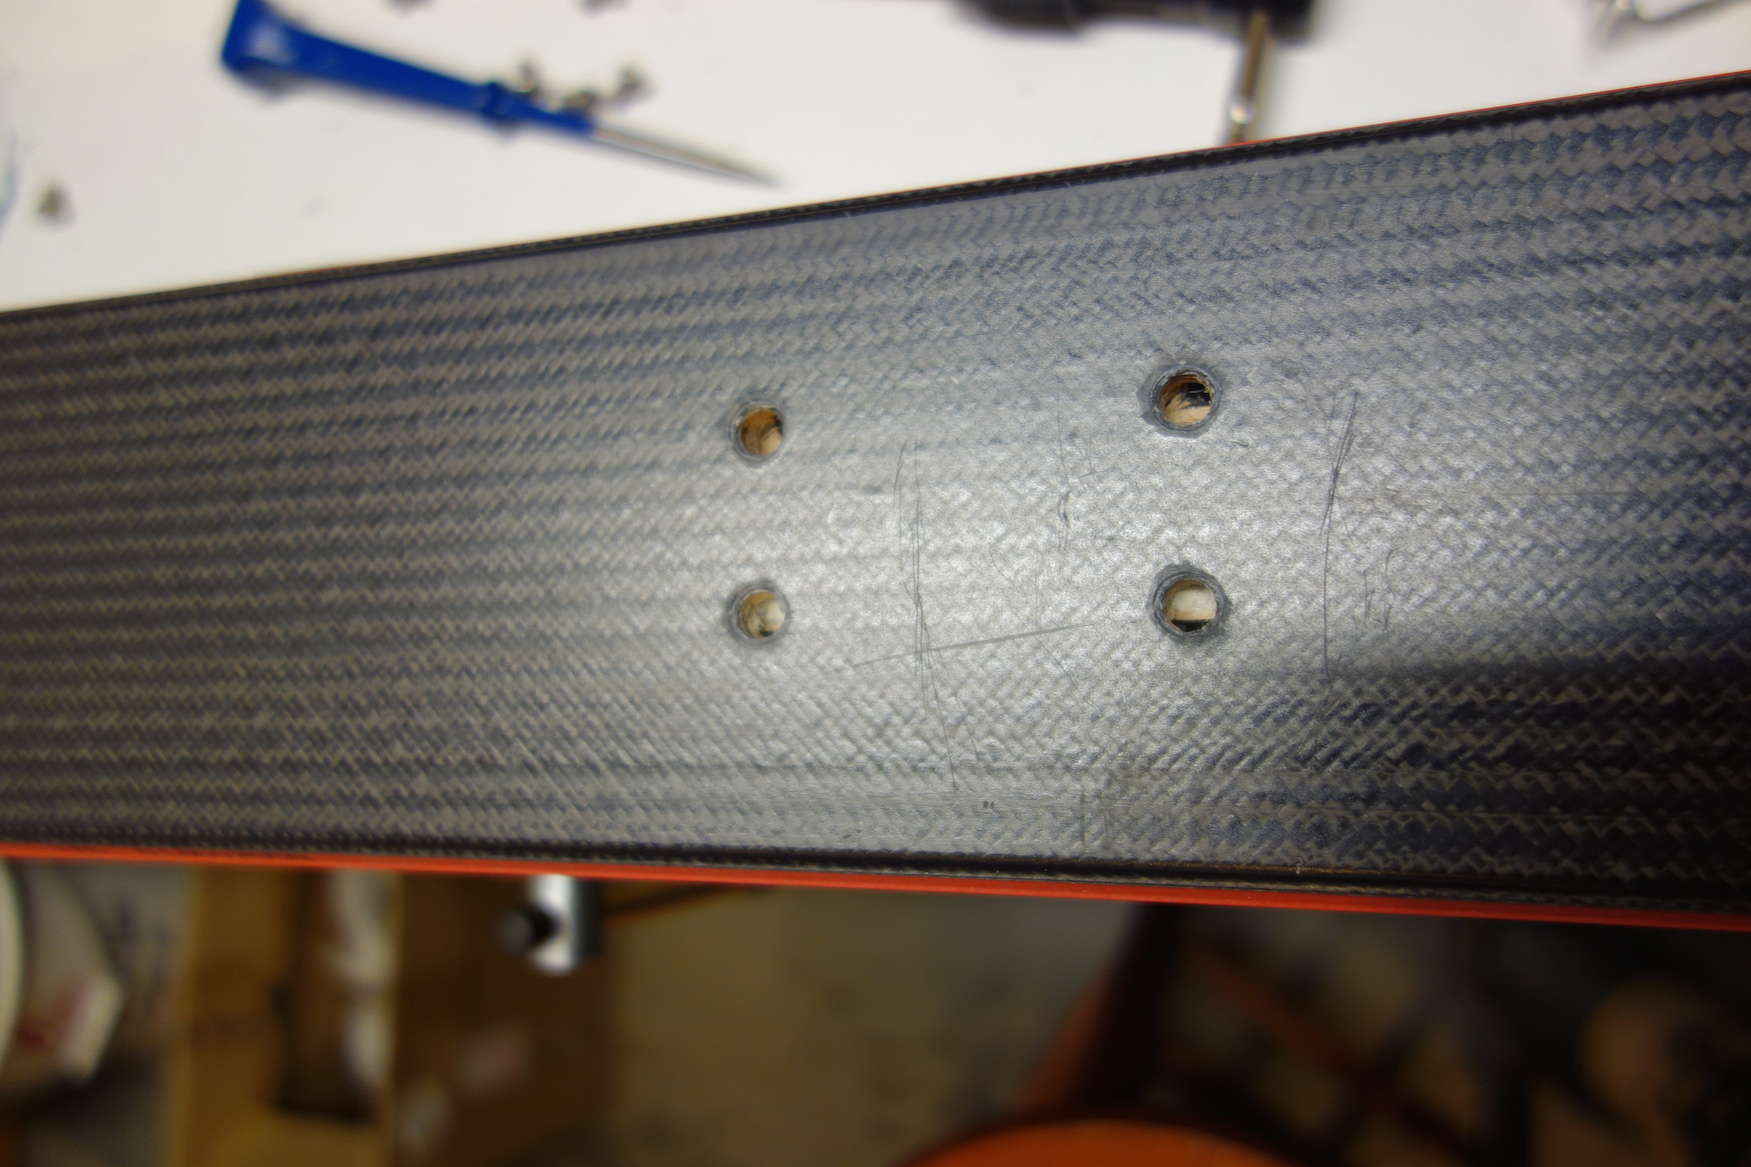
I'm not so bold (yet) to mount my own bindings so I recommend that you start with previously mounted skis and simply overdrill and tap the existing holes. This usually works out fine and makes for an easy transition.
WARNING: Binding inserts with machine screws have far tighter tolerances than wood screw mounted bindings. This means that if your original mount was not done with a certain amount of precision, your inserts may be off enough to prevent you from remounting your bindings with the inserts in place. This would be, ummm....disappointing. I'll share with you a trick here that can mitigate some of this mismatch.
Tools
There's no substitute for proper tools when doing something like this on expensive toys. Why would you wing ding this project on your $1,200 powder skis? Don't. Get the right stuff and proceed with confidence and precision.
In truth, you don't need too much. Start with a standard power drill. You'll need this to overdrill the screw holes. Next, the proper bit is fitted with a drill stop so you don't go flying through your skis on your way to penentrating your ski bench. You'll want to be drilling square to the ski so a drill guide is key here.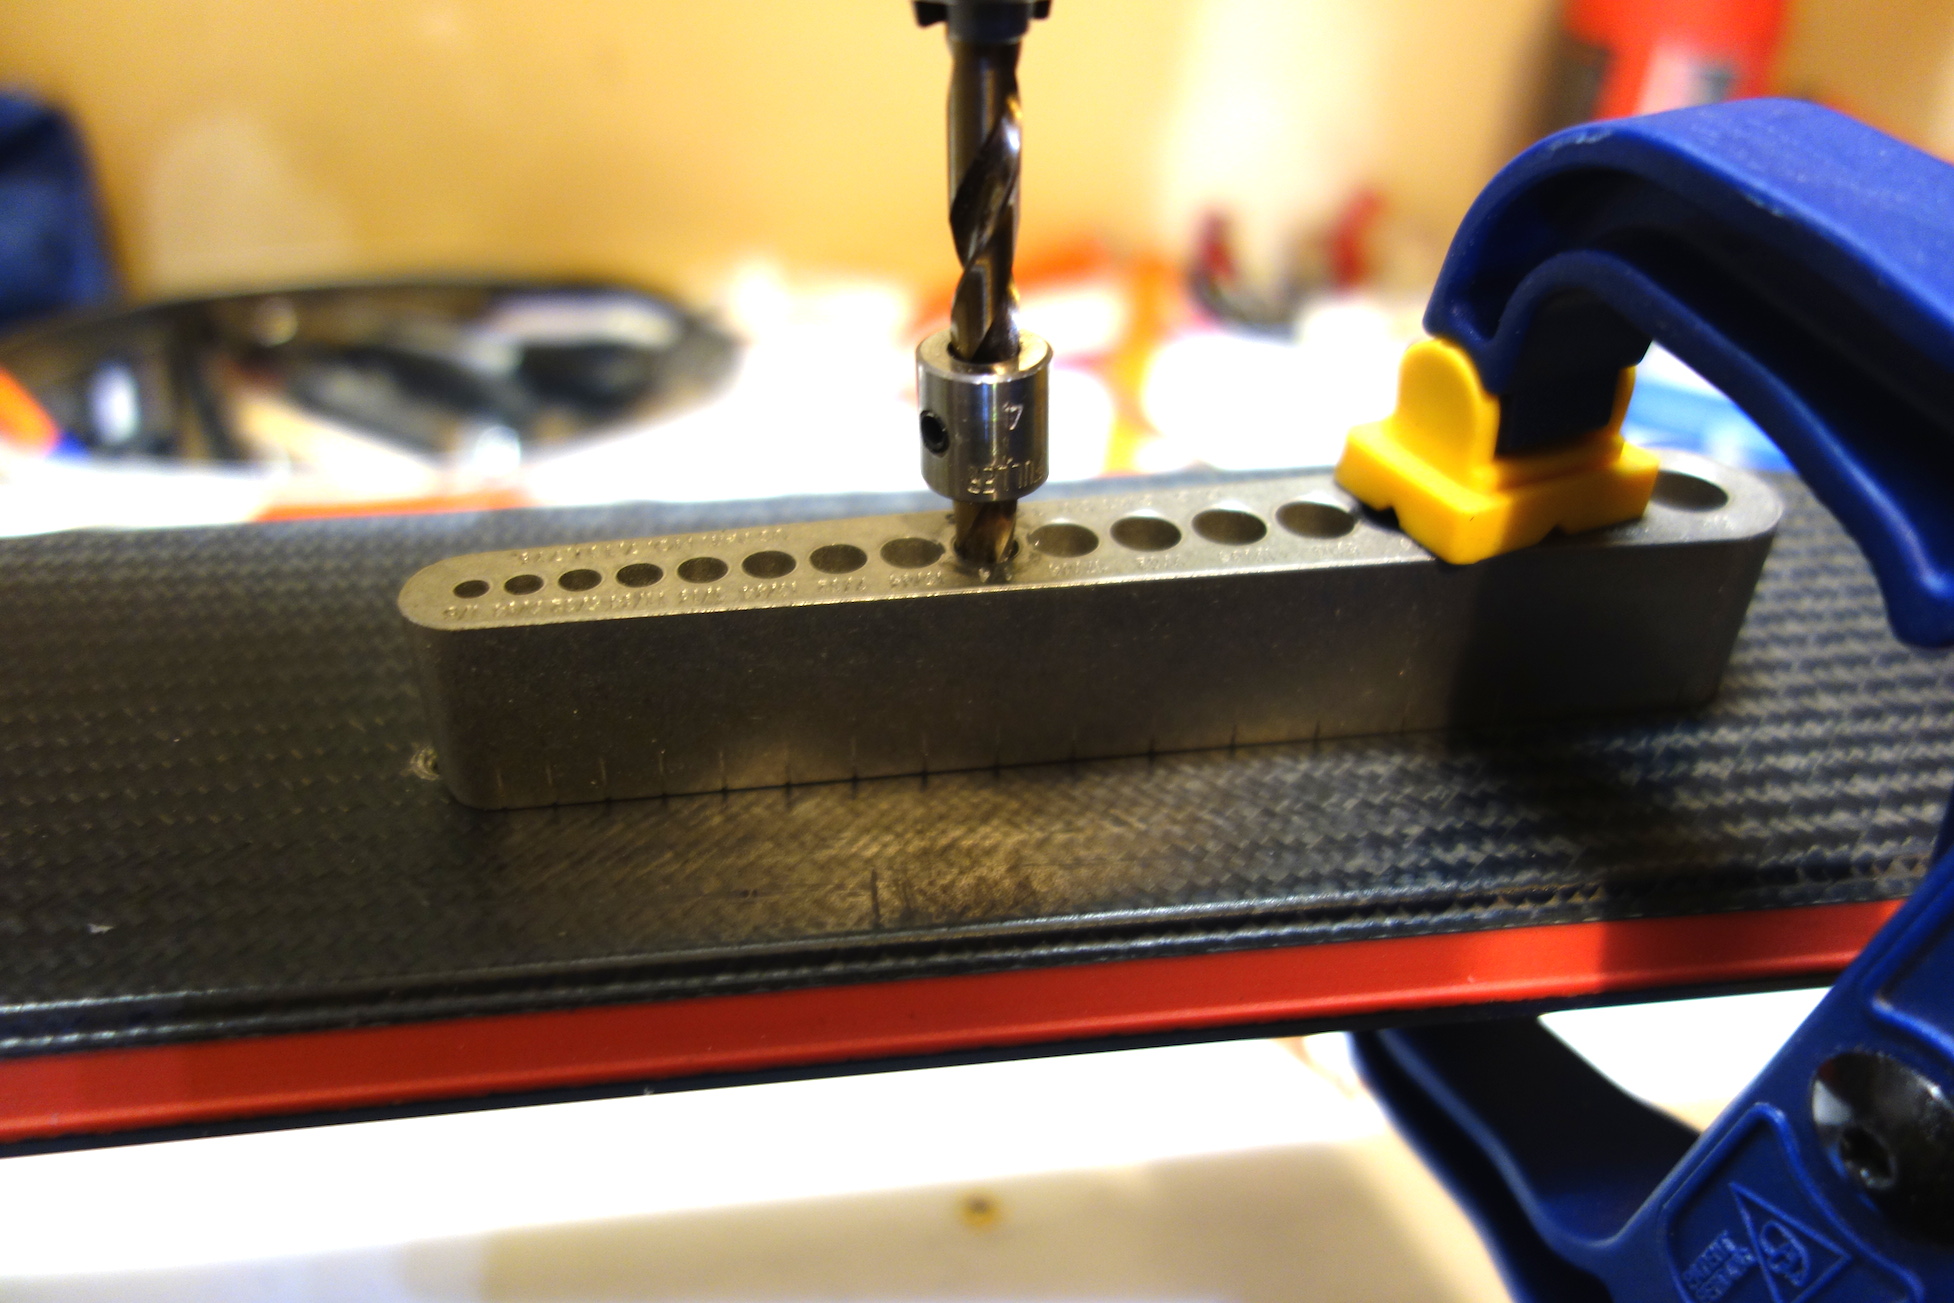 A countersink is a nice touch to clean up the holes allowing for smooth entry into the holes. Next would be a thread tap to set the stage for the inserts.
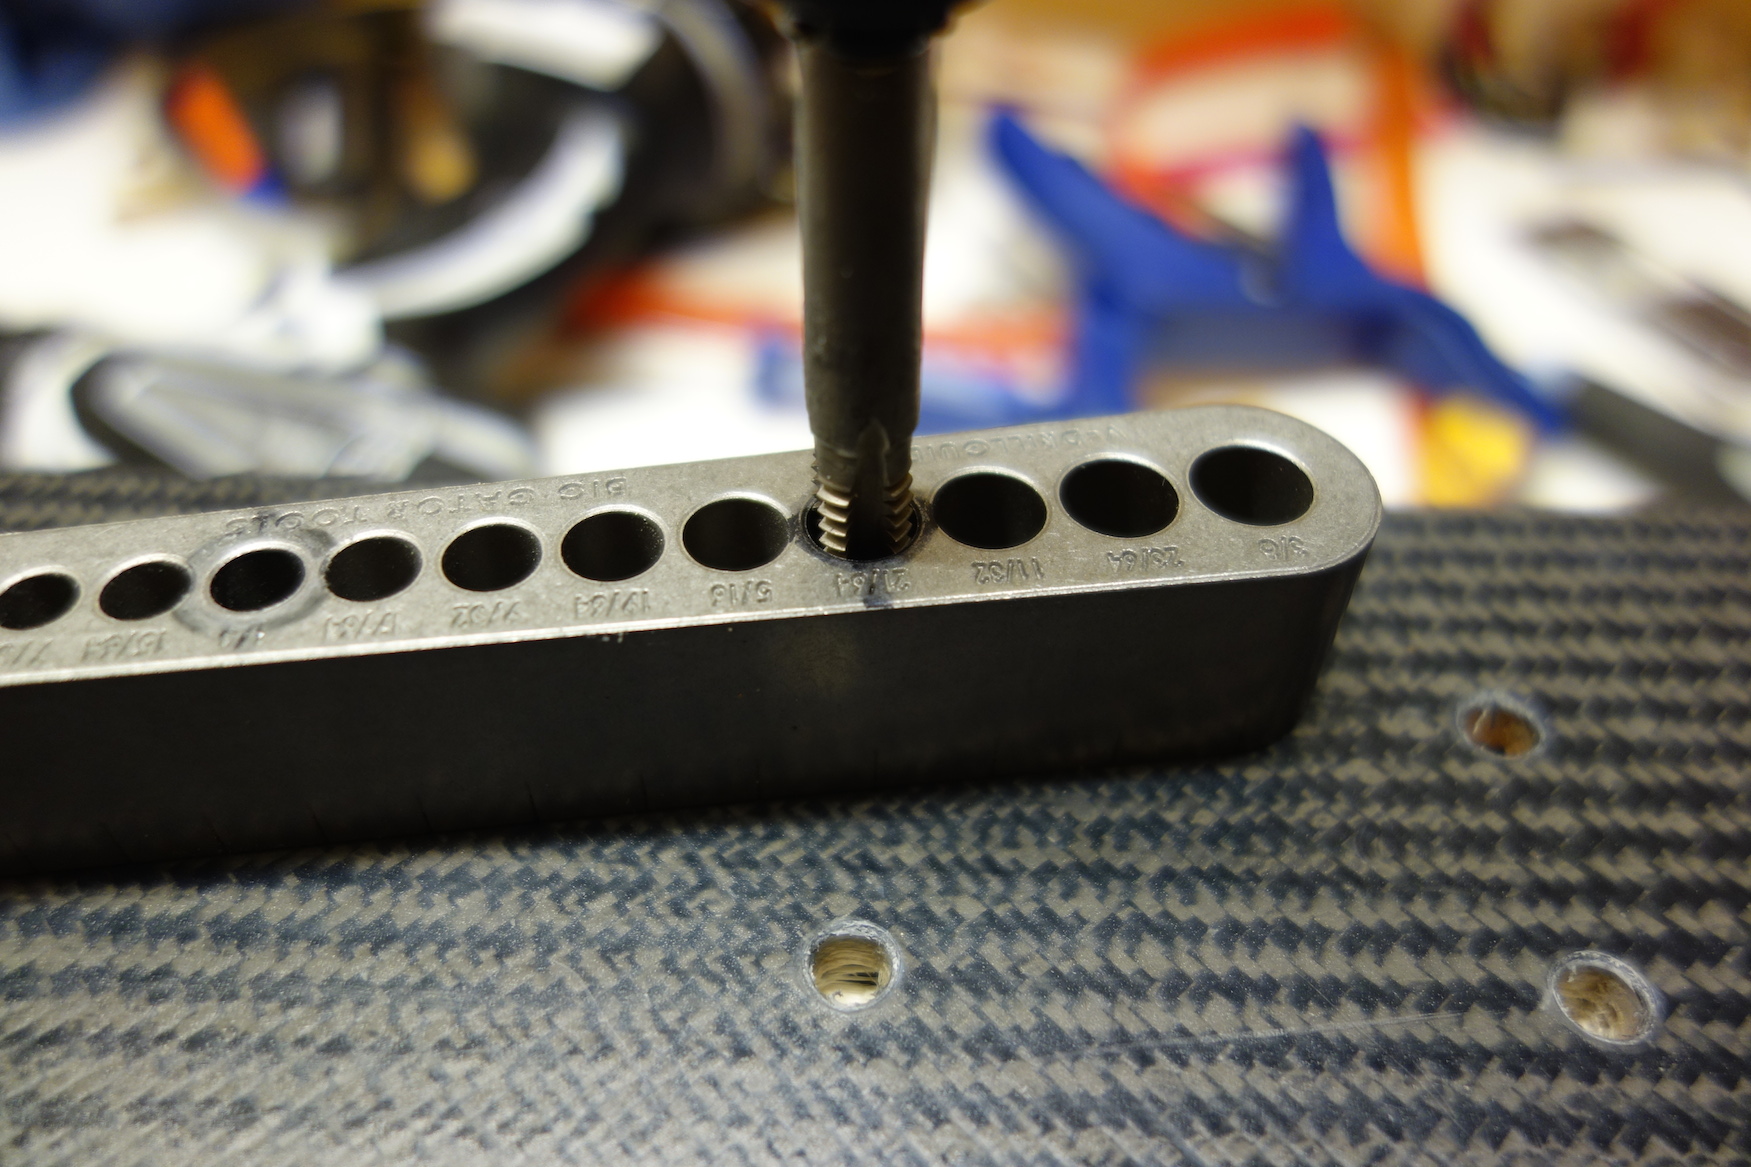 An inserter for the inserts is handy and there are two types that do the job. A long set epoxy like Hardman Blue with it's long working time is nice and gives you time to fuss around without the additional panic induced by quicker setting glues.
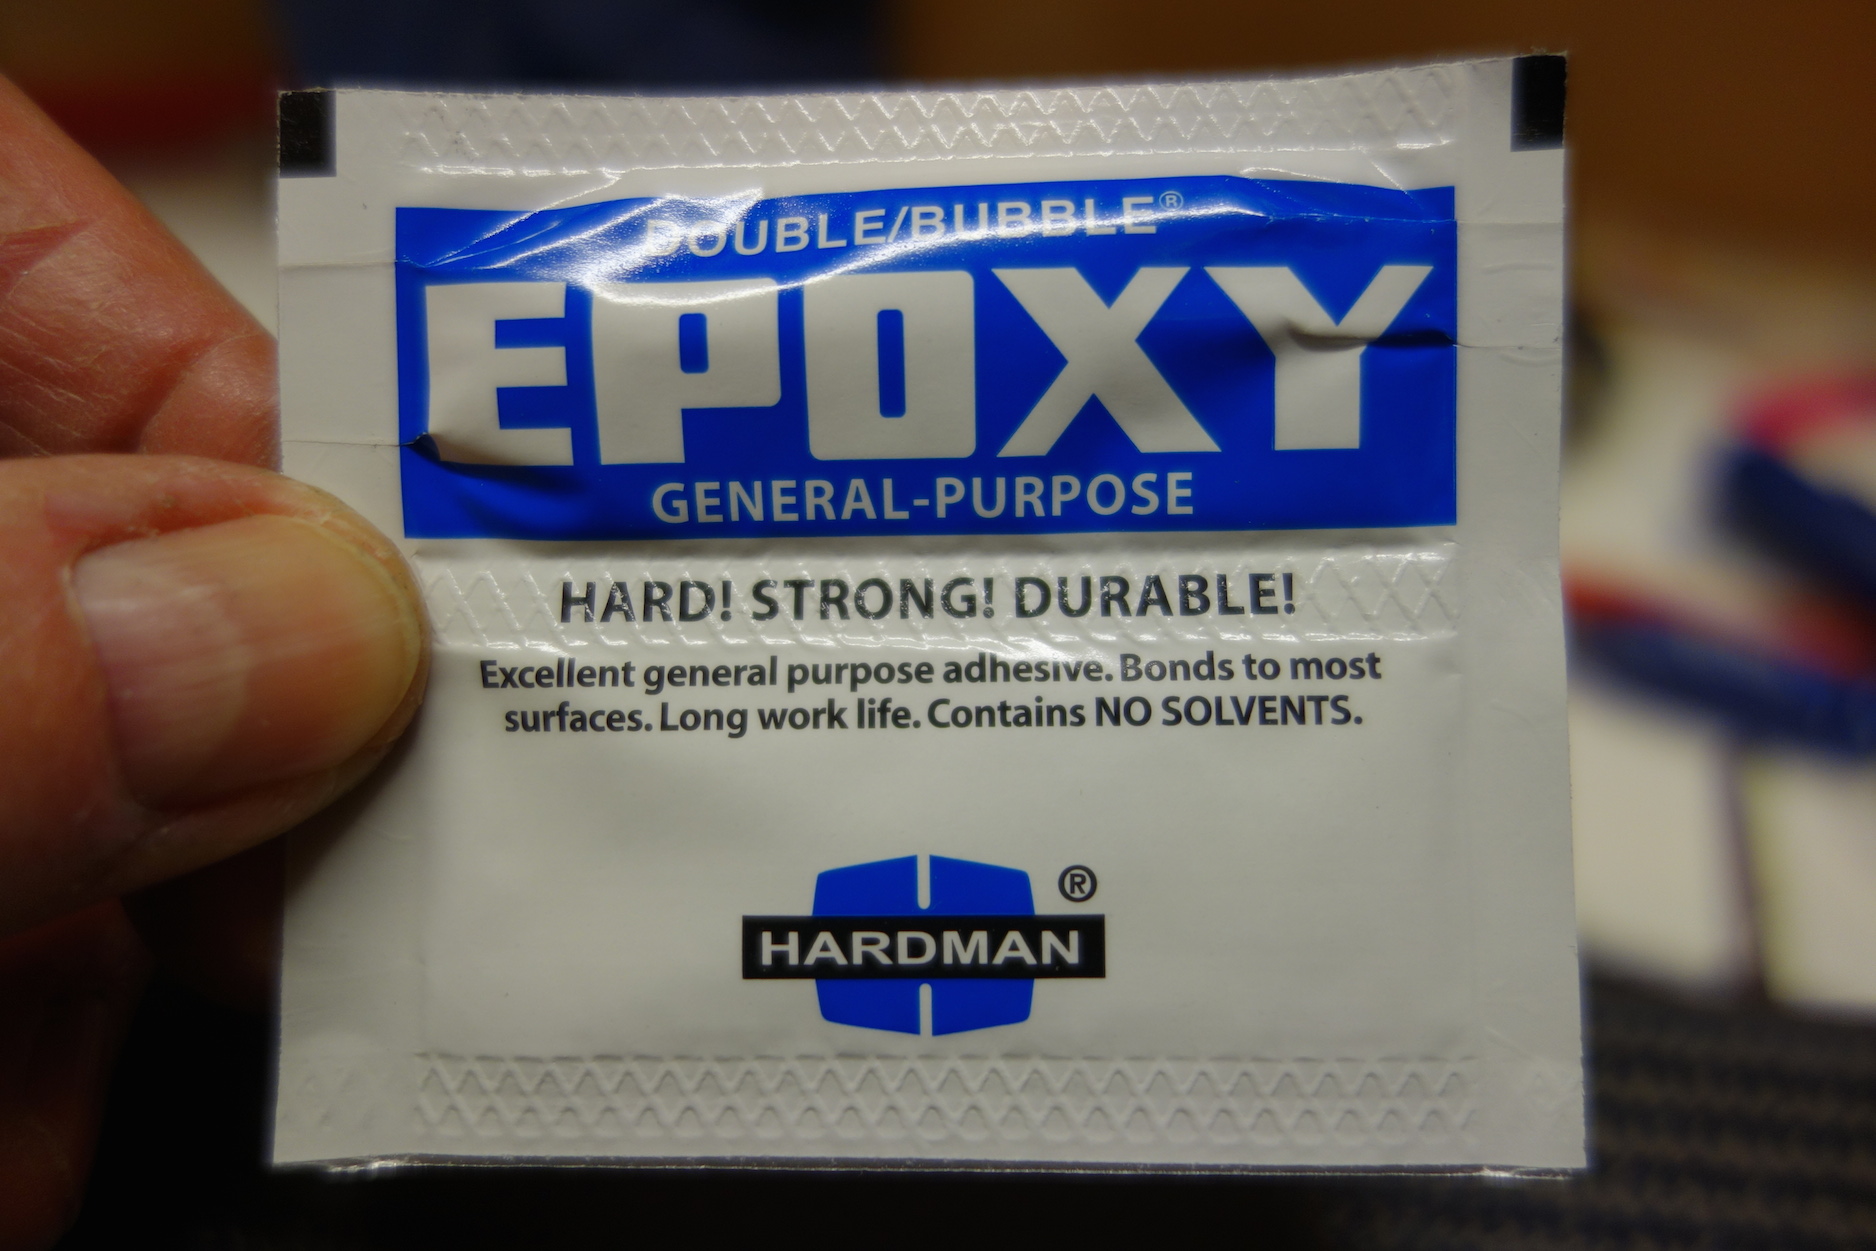 A clamp or two to steady the drill and tap guide is handy. That's about it.
Once the original screws and bindings are removed, I like to plane off the top sheet material that always protrudes around the screw holes. I've used the Ski Visions Ski Base Flattener or a standard window scraping razor blade to do the job cleanly. Follow this up with a few turns of the counter sink on power and the hole should be nice and clean.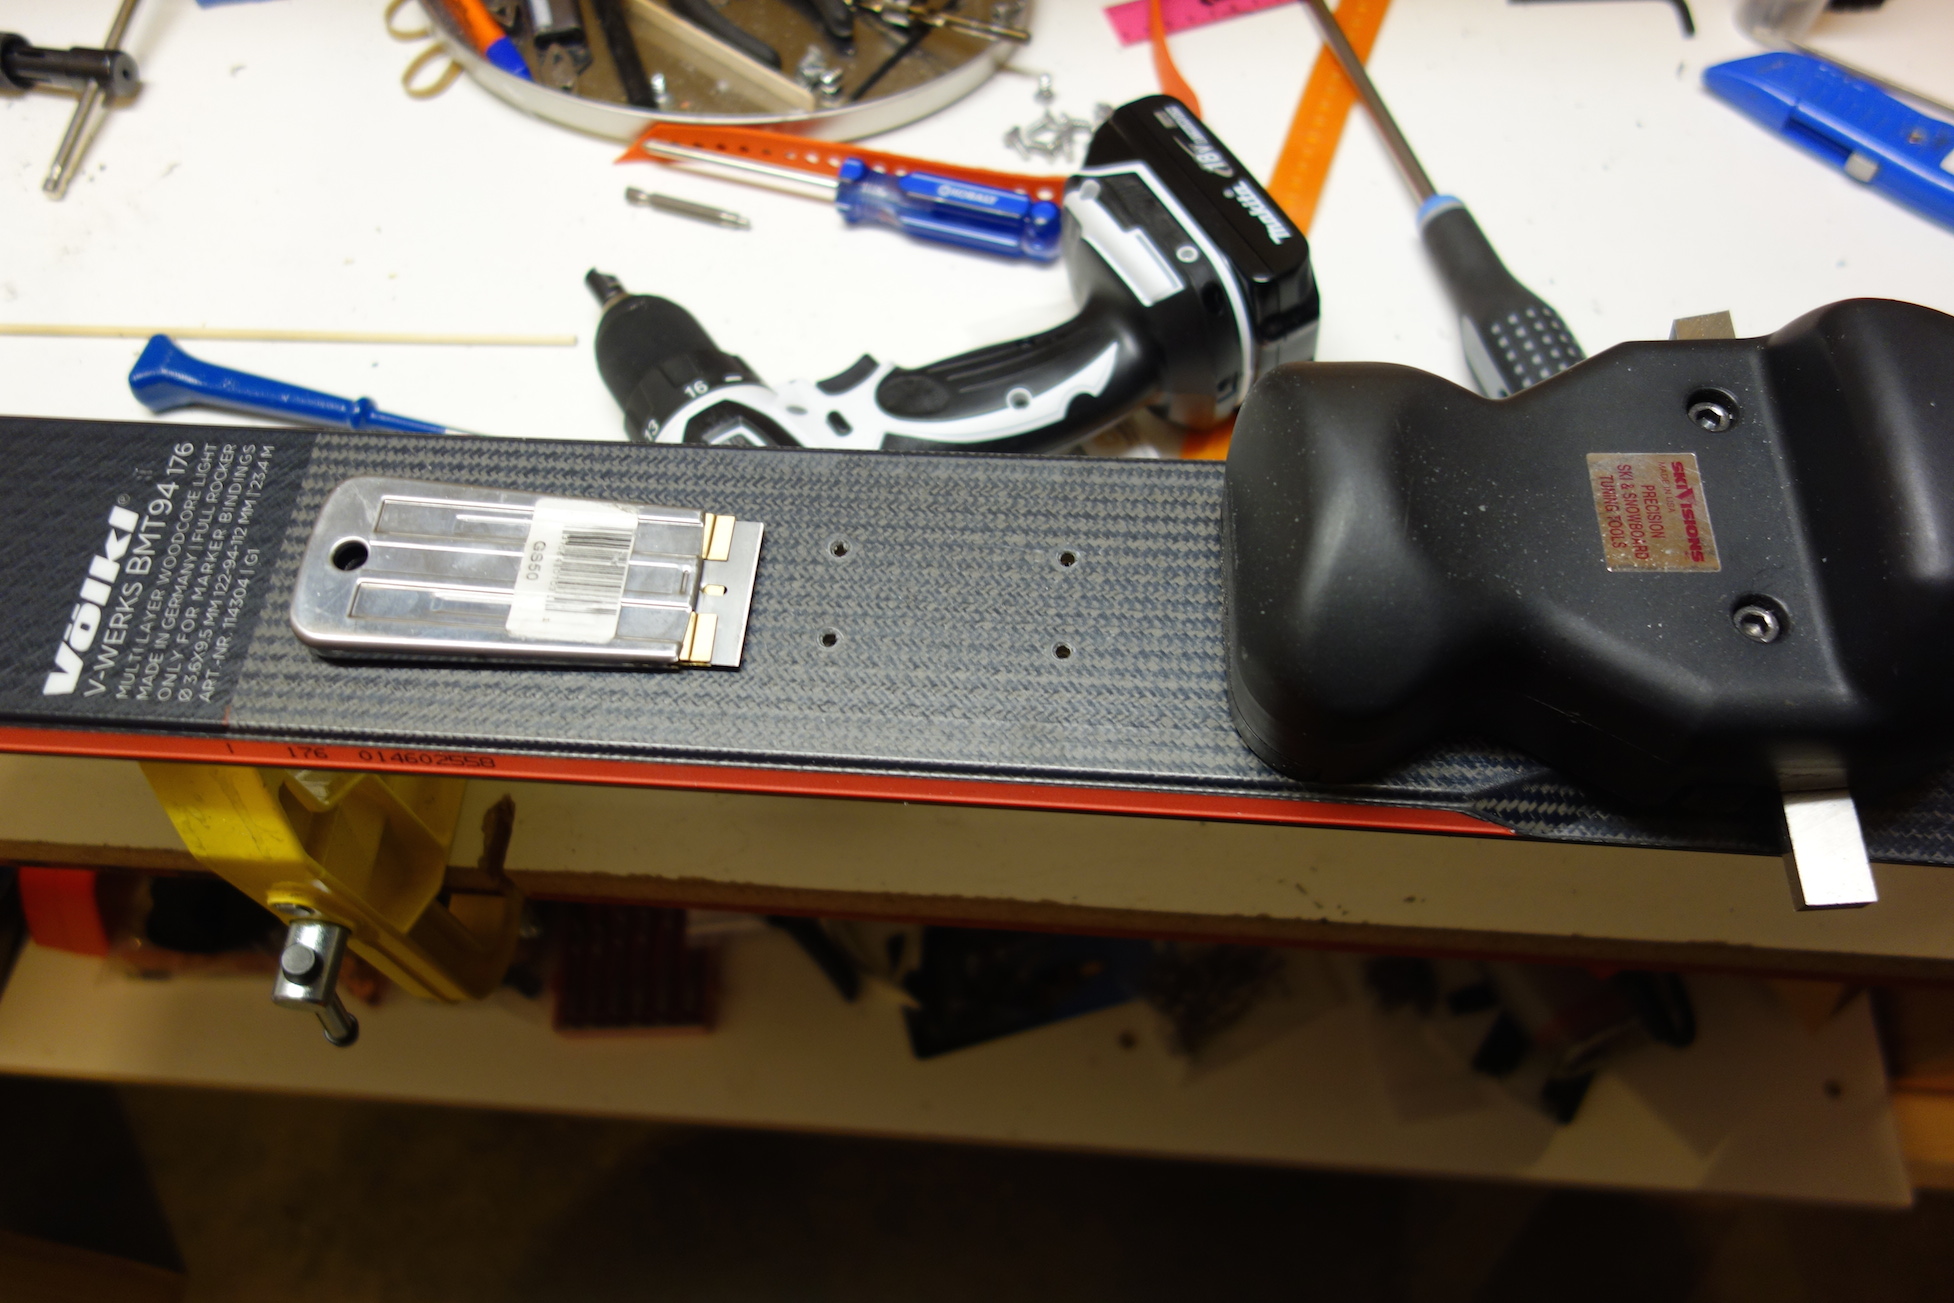
Next, set up the insert drill with the drill stop set appropriately with the thickness of the drill guide in mind, of course. The hole should be 9.5mm deep. A caliper is nice to help dial this in. After drilling, use the same guide with a larger hole and run the tap down, cutting the threads with steady, even pressure and being sure not to over tap once bottomed out. This will shear the threads.
I then clean the top of the holes again with the countersink and retap the first few threads to be sure they're totally clean. I finish by shop vacuuming out the holes so they're completely free of debris.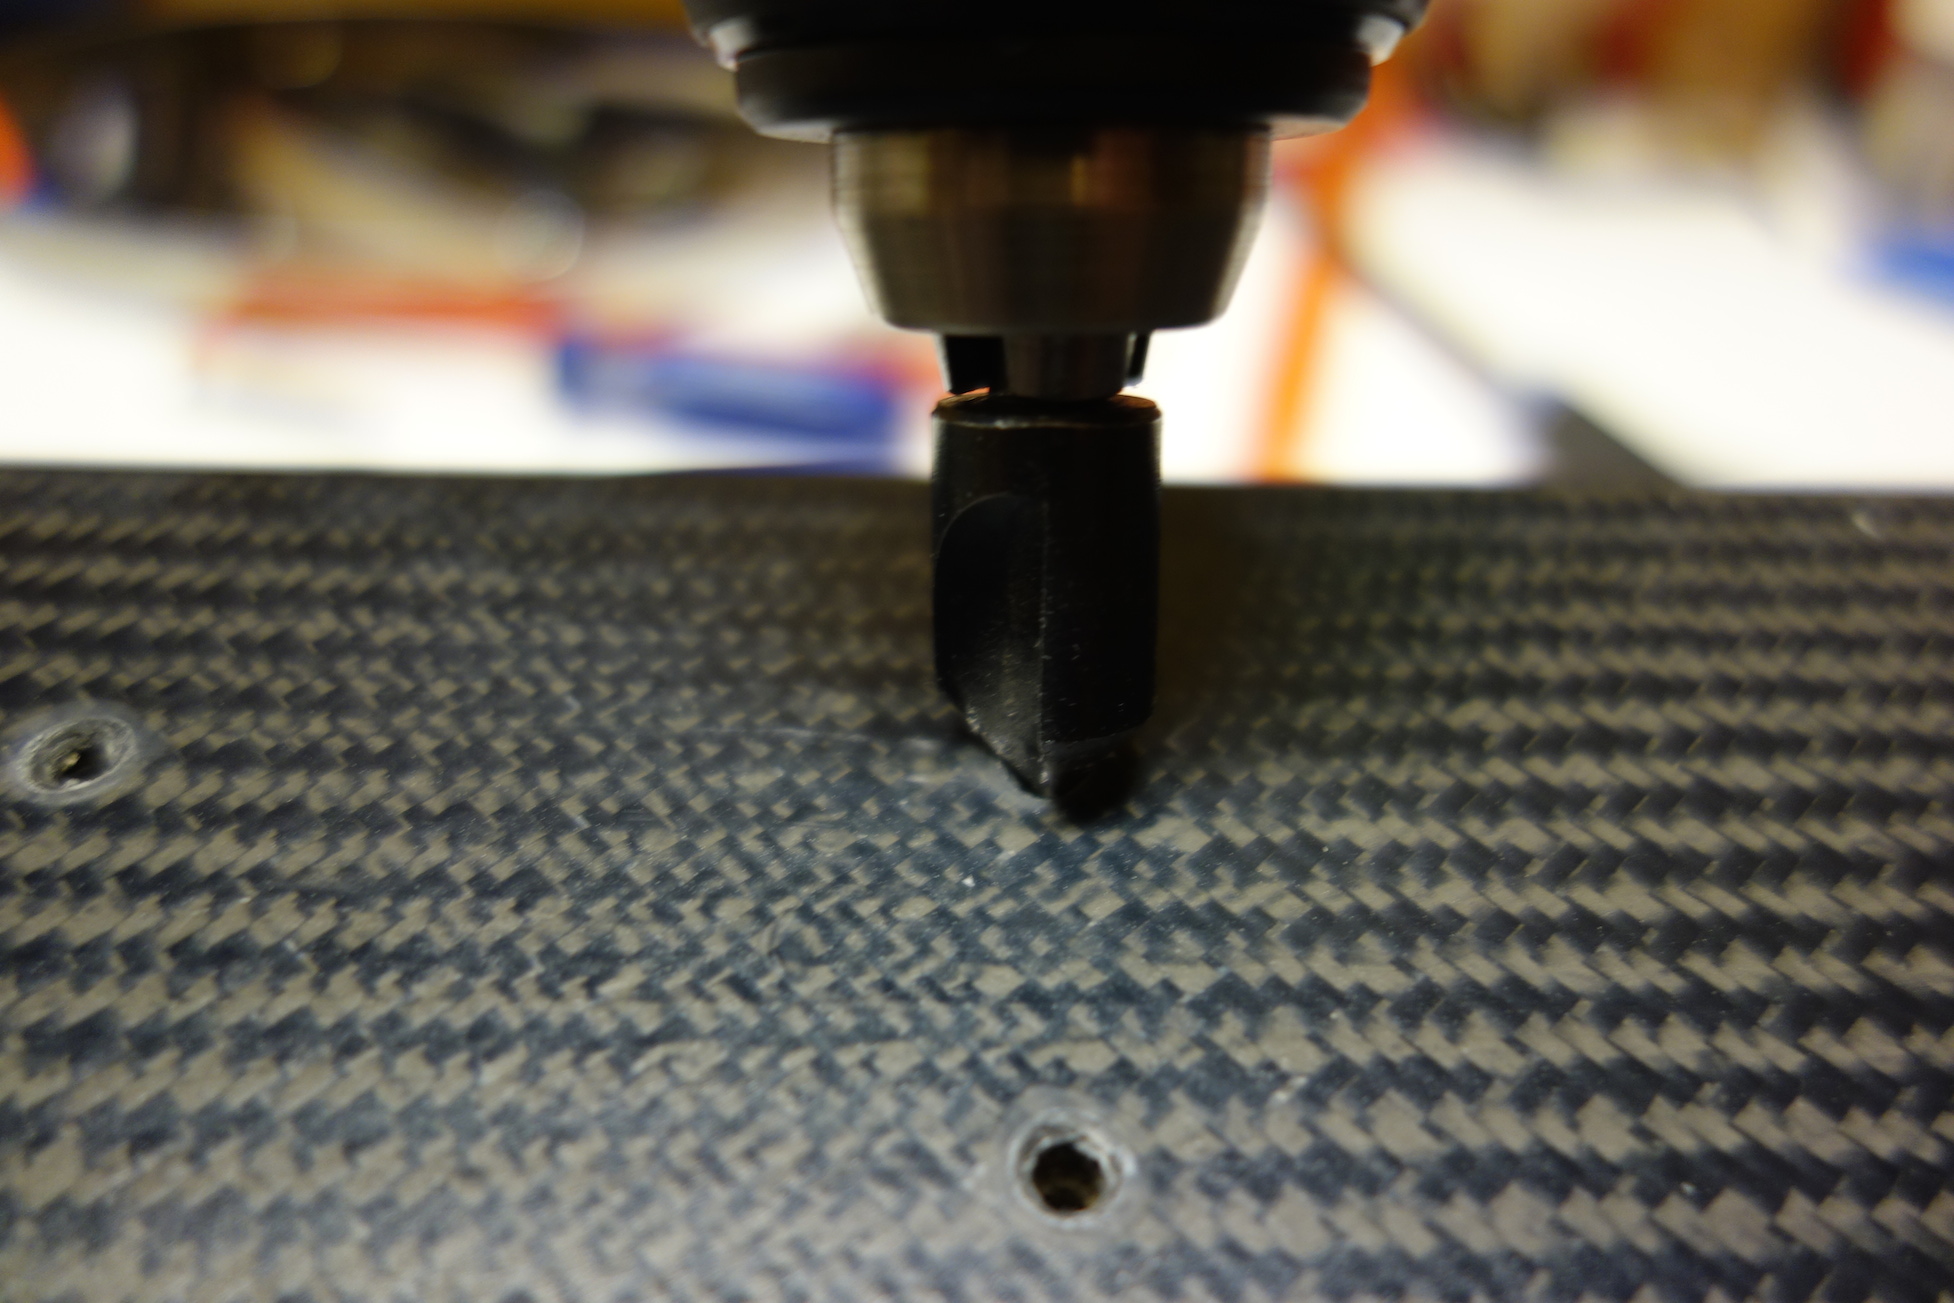
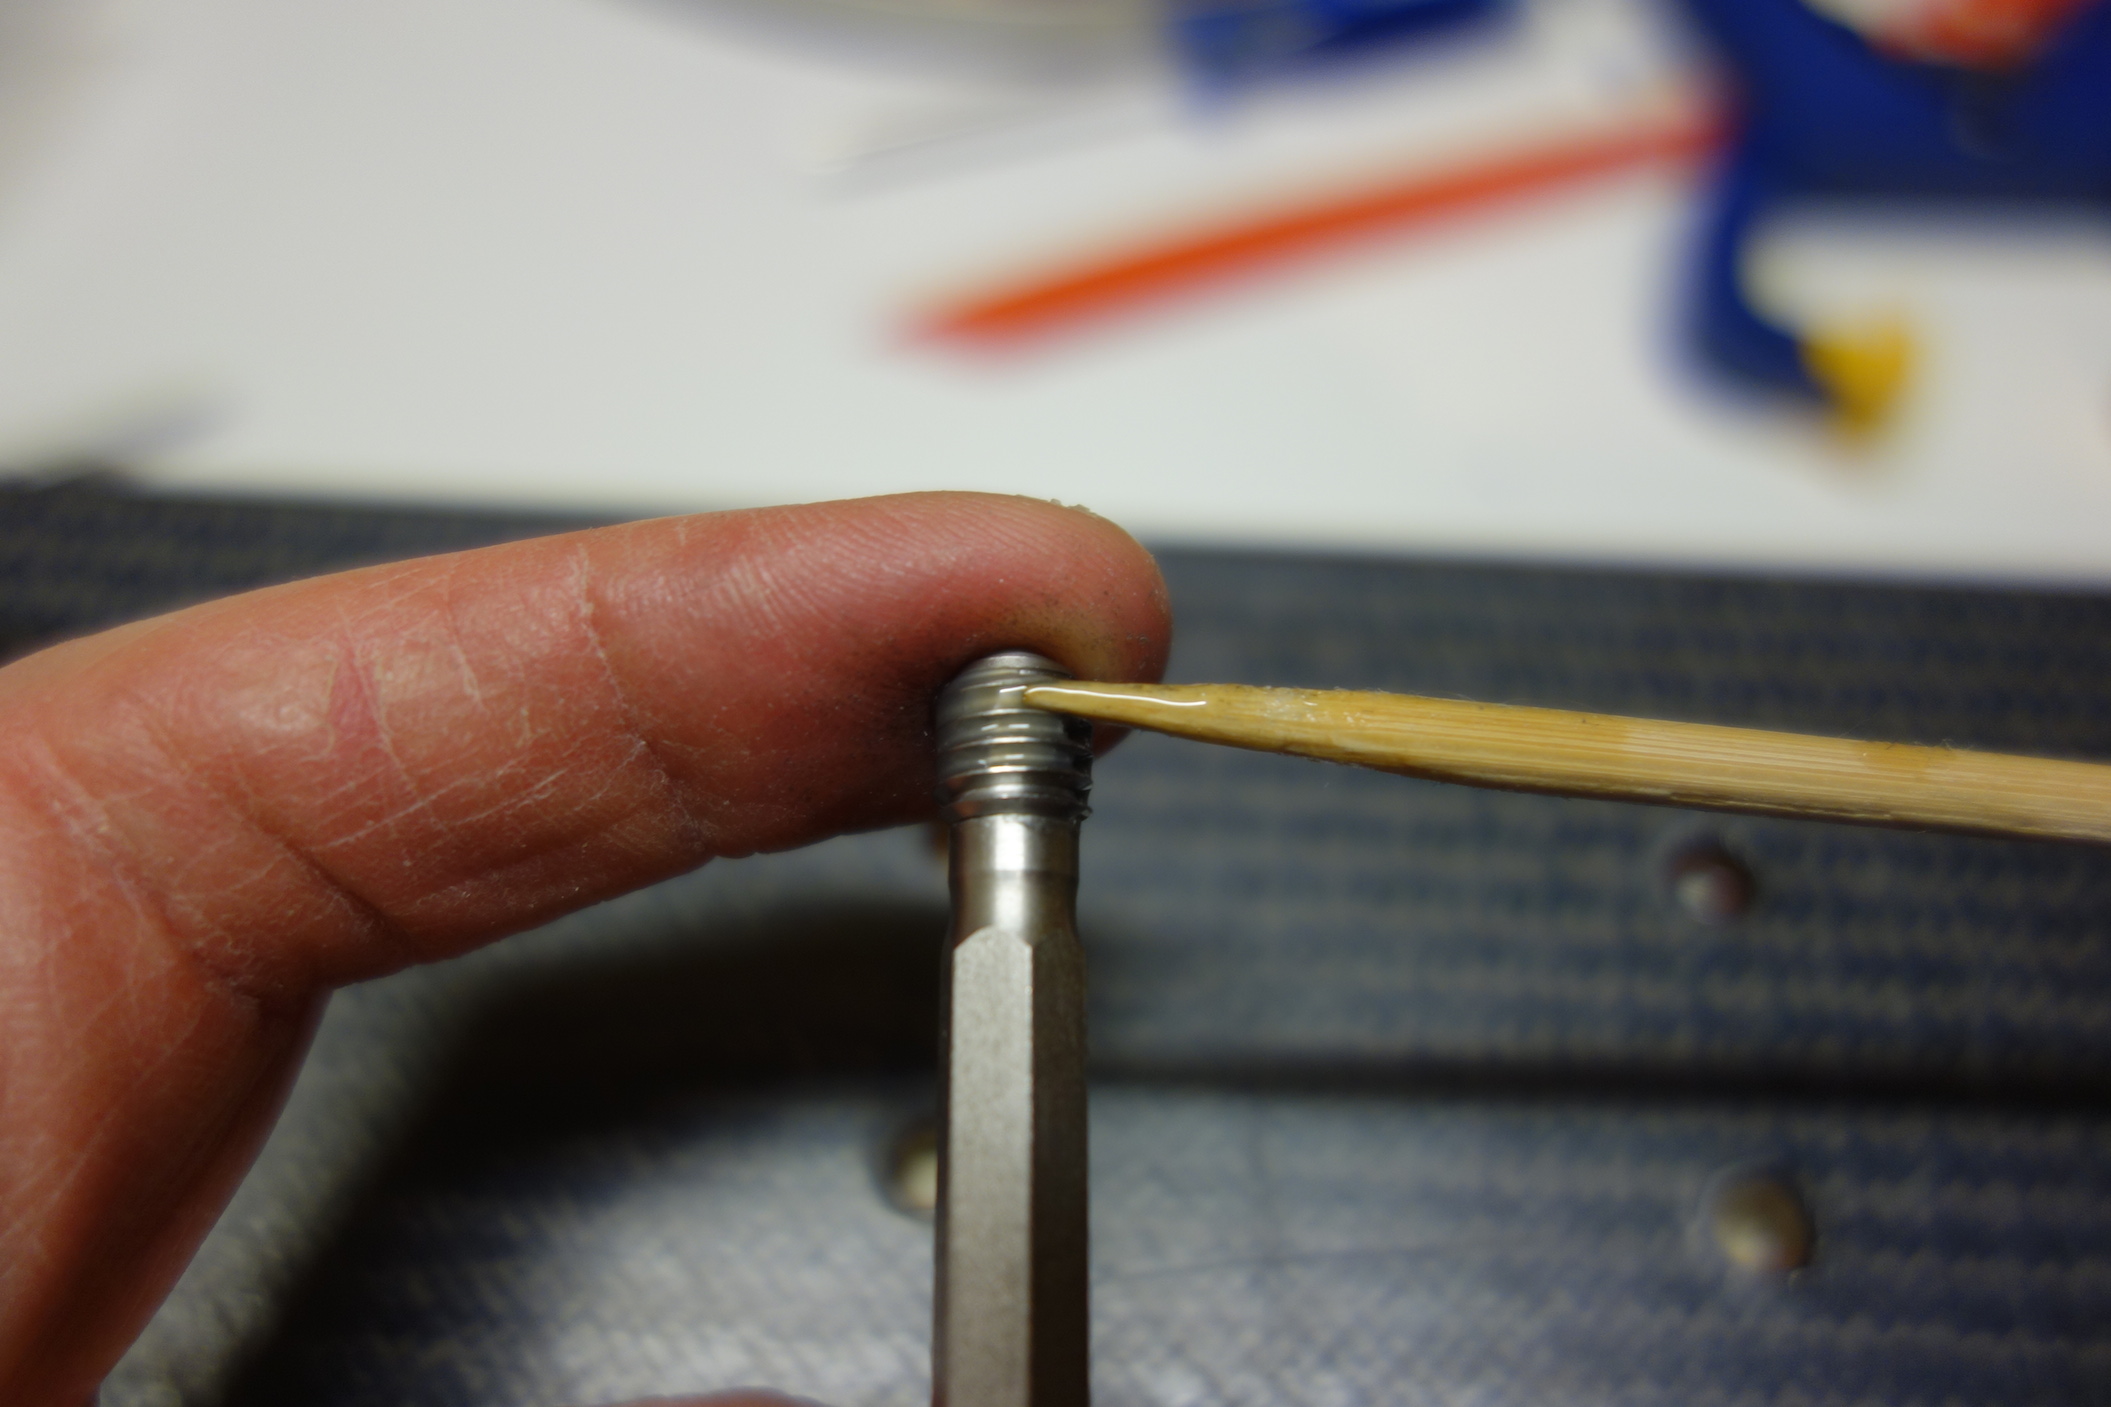
Now the fun part. Mix the epoxy and, using a tooth pick, coat the internal threads and the bottom of the holes with adhesive. I then mount the insertion tool onto my tap handle and poise an insert on top. This allows me to then coat the threads of the insert with more epoxy. Don't go crazy here as too much adhesive just gets spit out the hole, threatening to clog the internal insert threads and making a mess on the top sheet.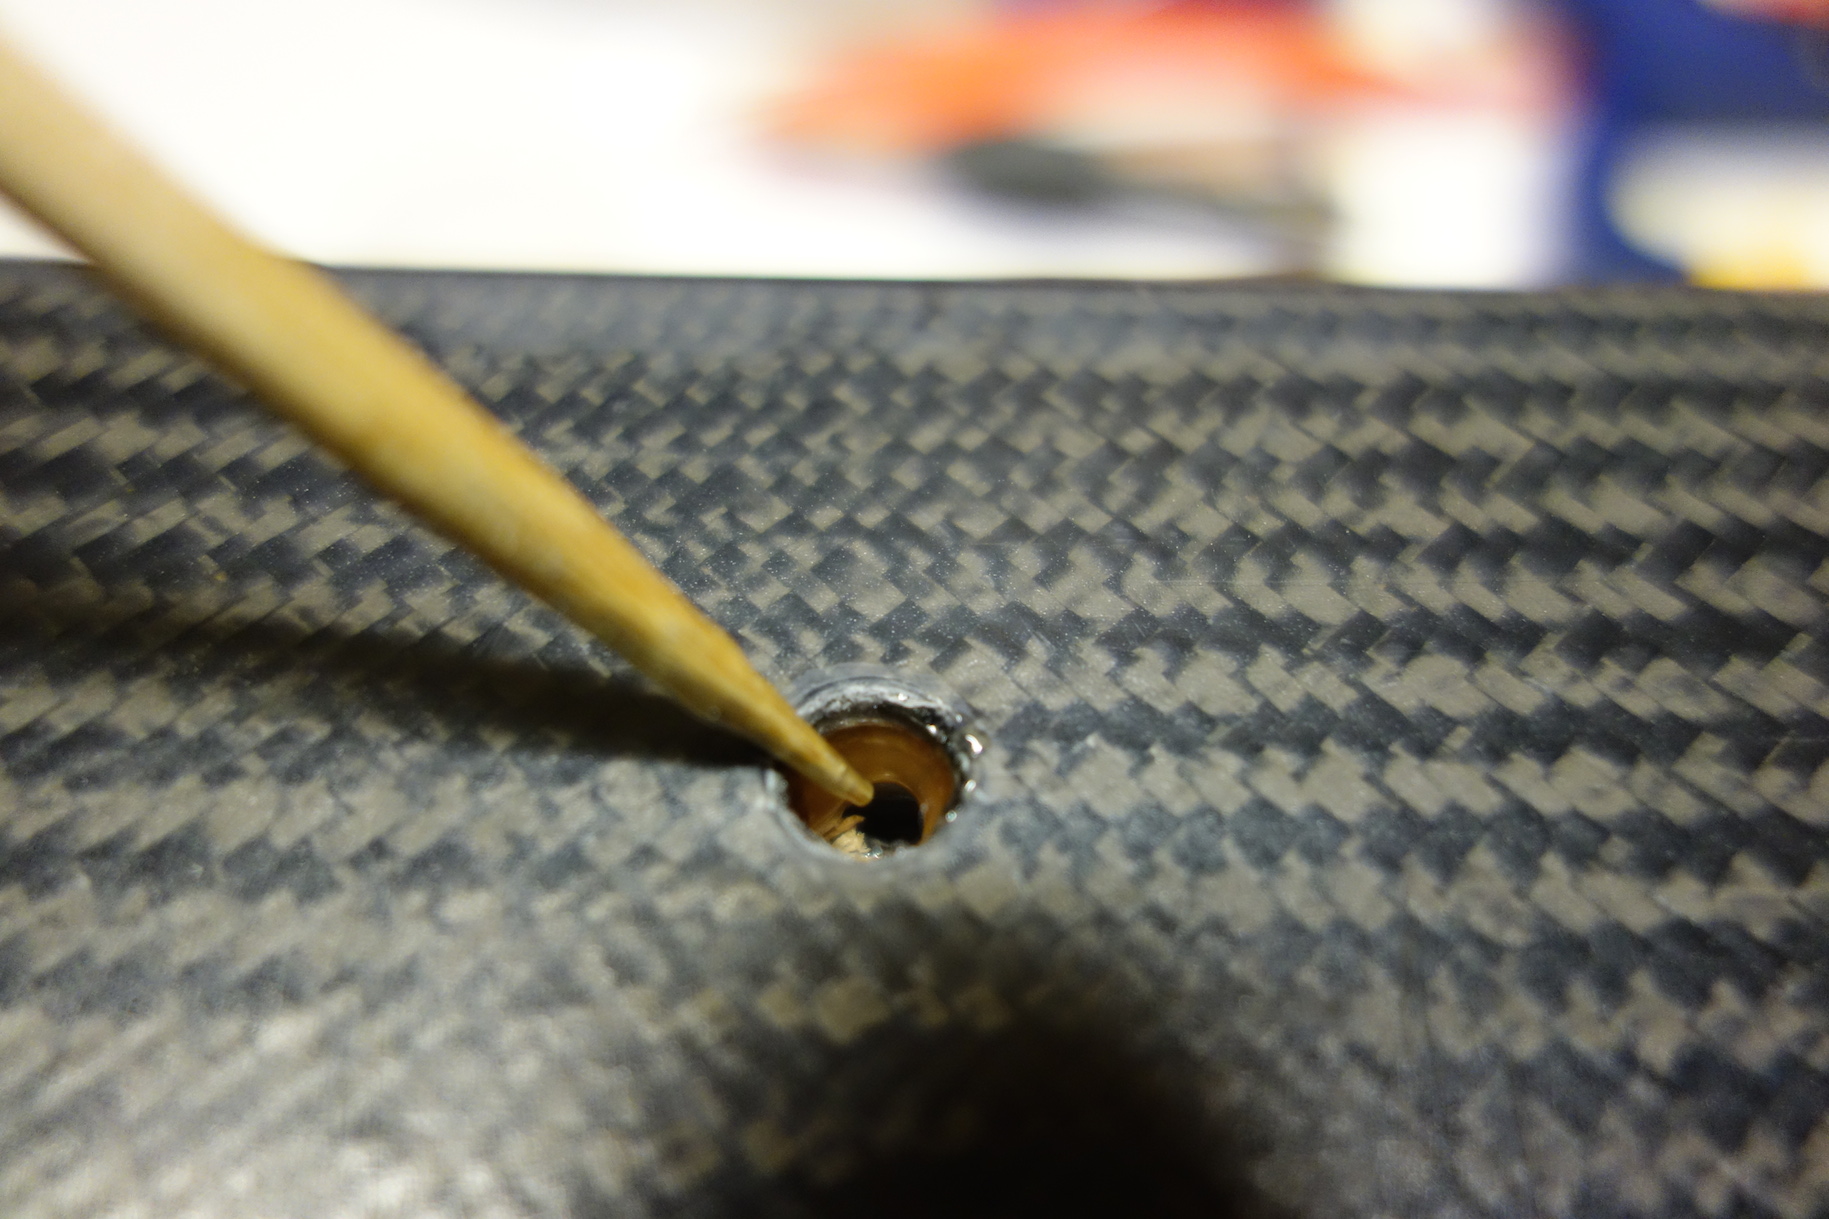
Prior to installing the inserts, I typicall soak them in a little Simple Green and rinse thoroughly and then air dry. This gets any greasy contaminants off the inserts so the bond is good.
Once the insert is ready to install, simply invert the inserter and poise the tip of the insert squarely on the opening. The first few turns should go easily. Be sure not to cross thread. Mental tension is typically high at this point. Turn the insert until it is just flush or slightly below. Wipe off any excess epoxy as you turn it down so that it doesn't slop over into the insert's screw hole. Once all four are in I typicall use a rag and wipe off all excess adhesive. It can continue to ooze out over the following few minutes after the inserts are down.
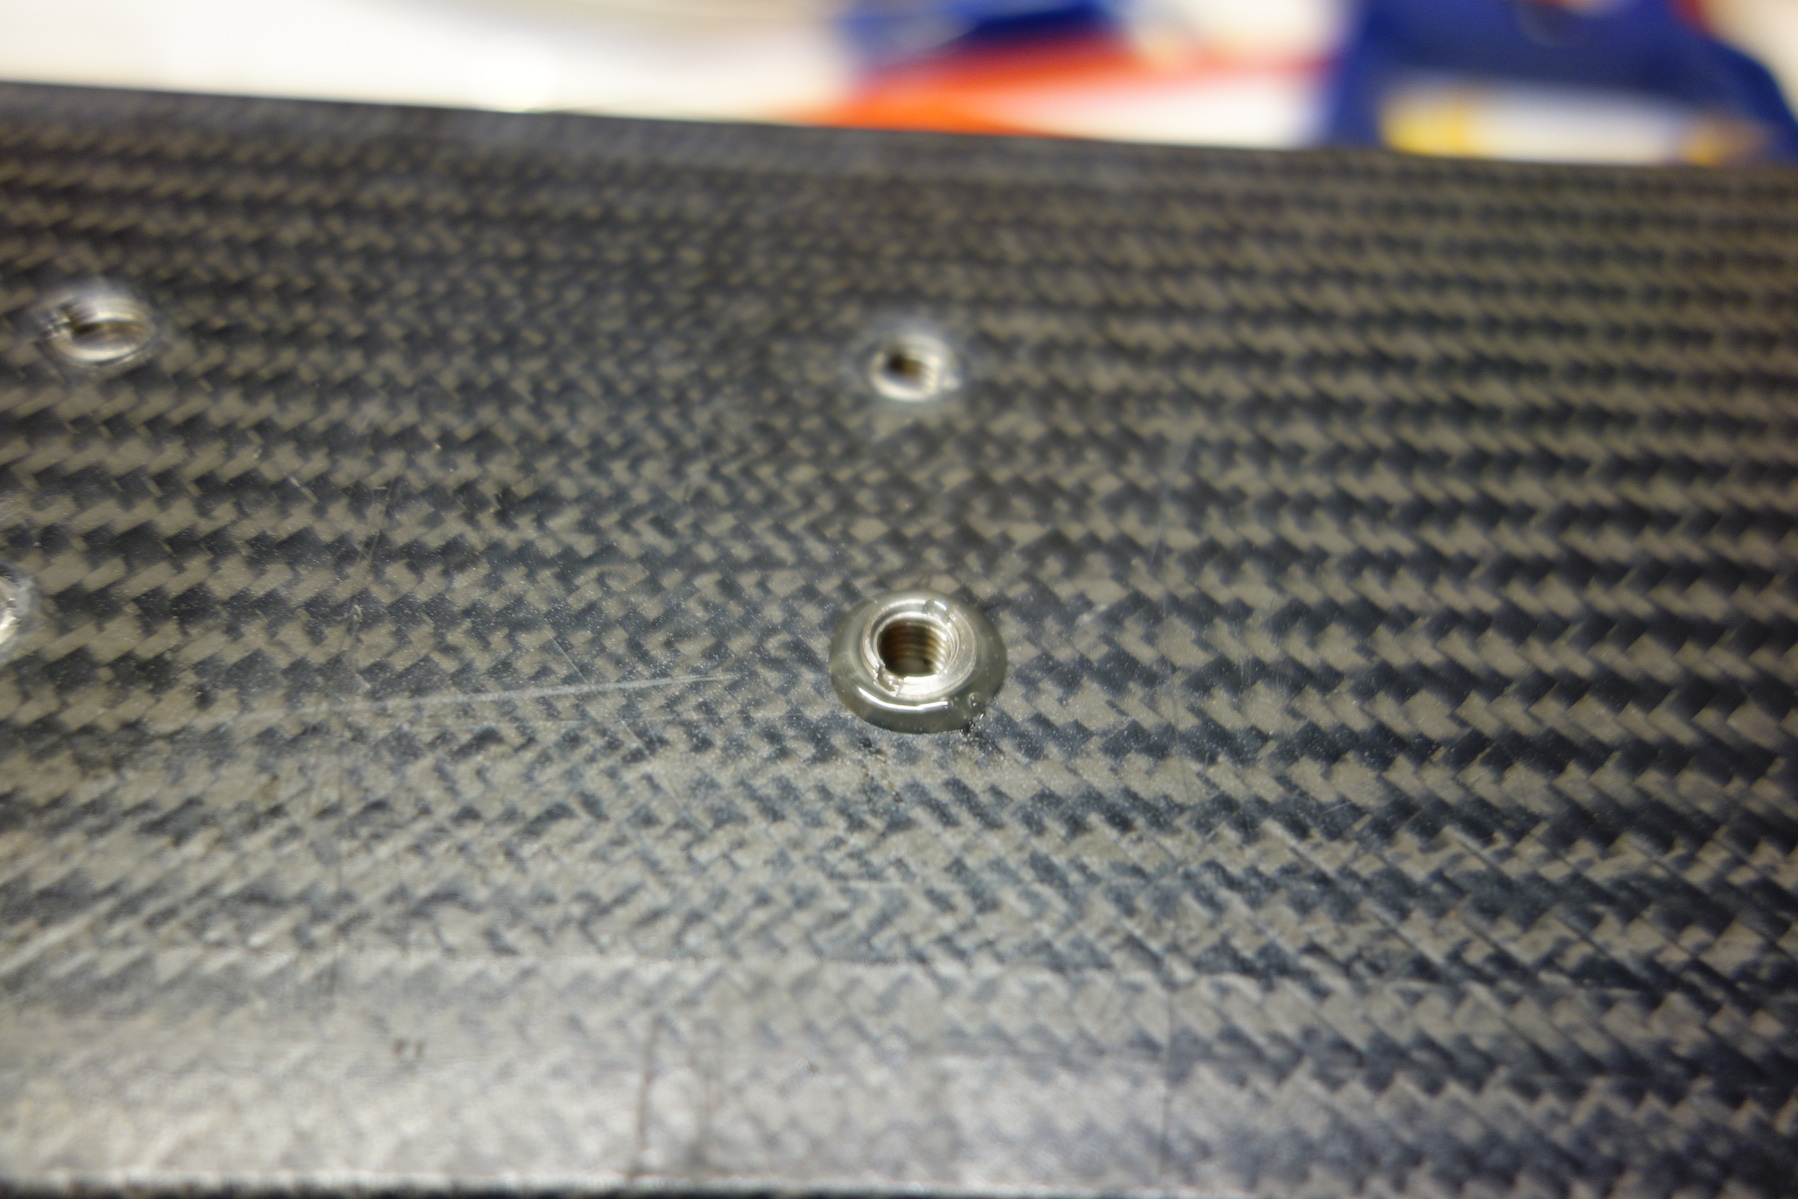
Now for the little trick for mismatched holes. Using the appropriate length machine screws designed for the inserts, loosely mount the binding. By keeping them loose it's often possible to tweek the binding in order to get each screw to cleanly engage. Once all four are started, alternately tighten each screw a few turns at a time until all are just snug. Don't over tighten. This technique may clean up some of the mismatch by redirecting the insert ever slightly. Let the epoxy set for 24 hours.
Update
In the comments below you'll see some handy advice related to hole mismatch. Certainly, tweeking the front binding as described above might solve one problem but could potentially create a malaligned boot/heel pin situation in the back. Indeed, this is exactly what I have in one of the skis used for this post. I noticed some difficulty stepping in a couple of times and now I know why. The degree it's off is not unworkable but the situation brings to light another potential issue of these handy additions to your quiver.
I'm thinking the next time I mount some I'll drop the boot into the binding and let the epoxy cure with the boot in place. This may, again, tweek things just enough to correct small errors in alignment. I'm curious if any readers have comments on this idea. Please leave them below.
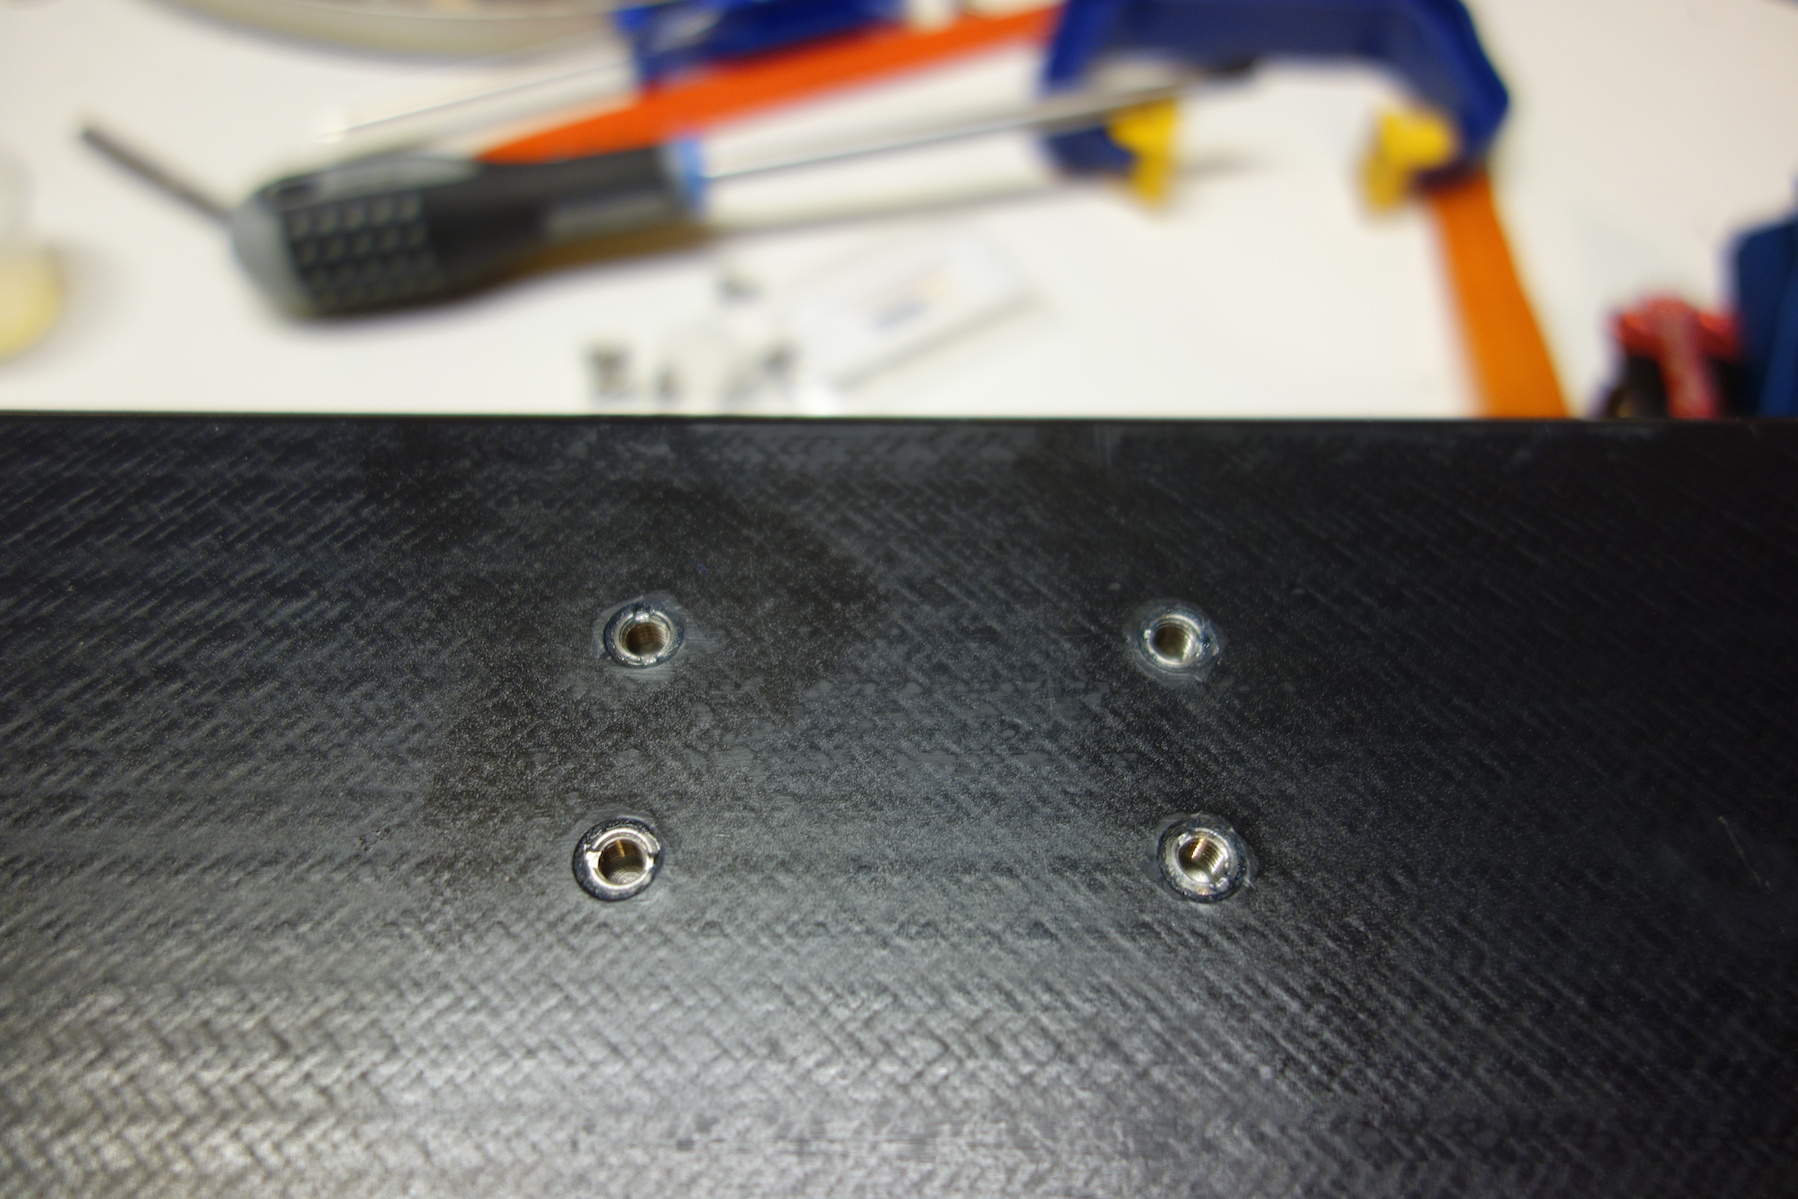
The next day, remove the bindings and check your work. I clean up the top sheet around the holes with a flat file as the epoxy is quite hard. Now with the screws coated with some Vibra Tite thread locker, remount the bindings with a snug, firm hand tight. You're ready to rip.